


World of Sport
Share
Published 16:28 18 Dec 2016 GMT
Updated 16:29 18 Dec 2016 GMT
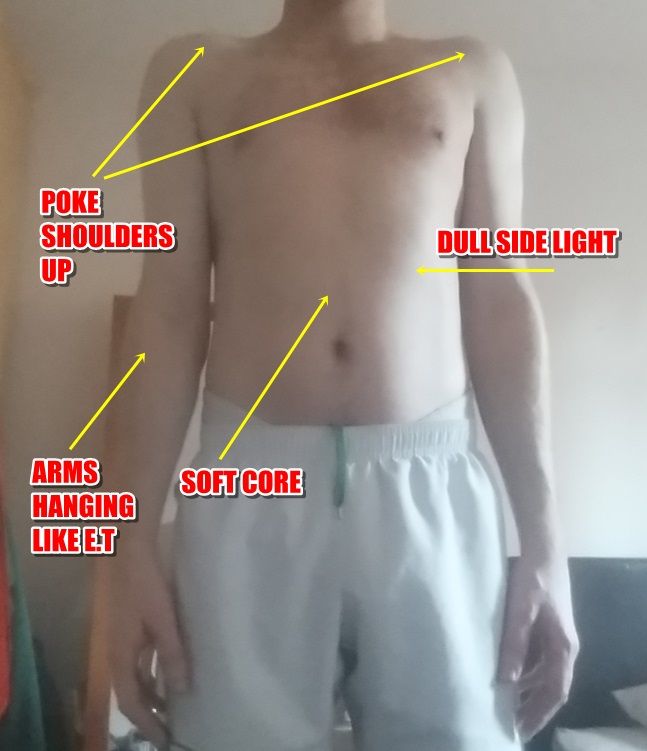 It's like when you're getting tested with your sports team at pre-season. Don't run up high scores, don't exert yourself too much - you want the improvement to look much greater than it actually is. Save yourself for the re-test.
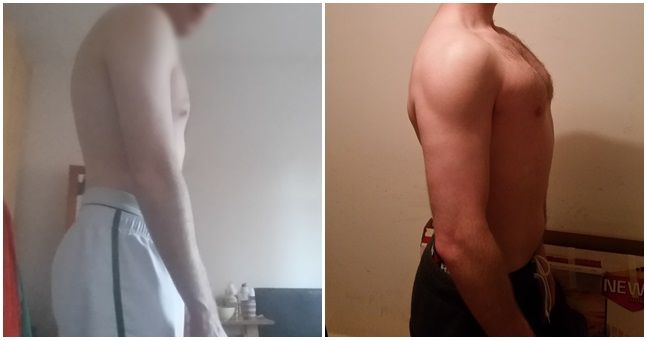
The main trick with this photo is the low camera angle looking up at the body. Very few would come out of that looking perfectly and the terrible lighting is working a treat.
The only way is up and, with a few minor changes, you can make yourself look completely different using the same camera in the same location.
Even the same body too.
It's like when you're getting tested with your sports team at pre-season. Don't run up high scores, don't exert yourself too much - you want the improvement to look much greater than it actually is. Save yourself for the re-test.
The main trick with this photo is the low camera angle looking up at the body. Very few would come out of that looking perfectly and the terrible lighting is working a treat.
The only way is up and, with a few minor changes, you can make yourself look completely different using the same camera in the same location.
Even the same body too.
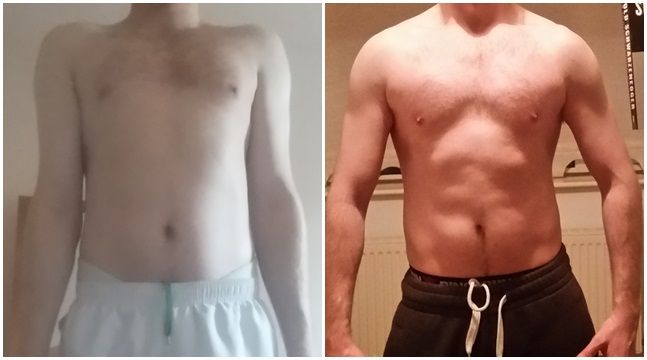 In the space of two days, there's some difference.
Those changes aren't going to move mountains but they'd definitely earn you a few Instagram likes.
Environment changes for the 'After' photo
In the space of two days, there's some difference.
Those changes aren't going to move mountains but they'd definitely earn you a few Instagram likes.
Environment changes for the 'After' photo
 A few things make a big change:
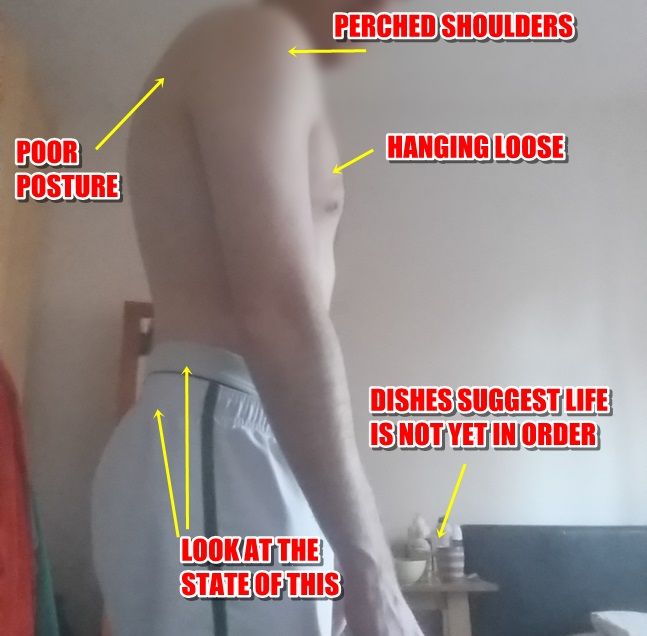 A couple of days later and it's easy to change this.
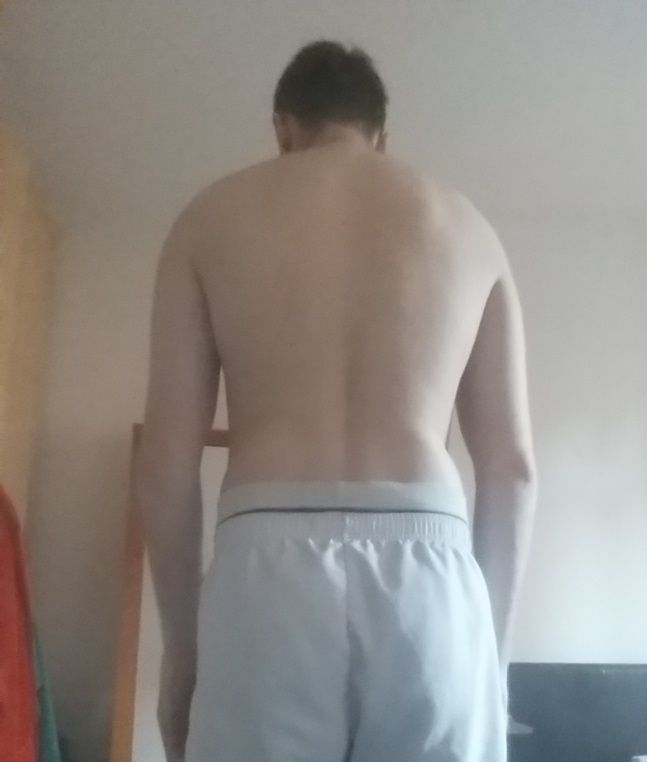 With a special programme though, anything can happen. Even this mess above can transform.
All you need is that special programme... and a few other, much easier things.
With a special programme though, anything can happen. Even this mess above can transform.
All you need is that special programme... and a few other, much easier things.
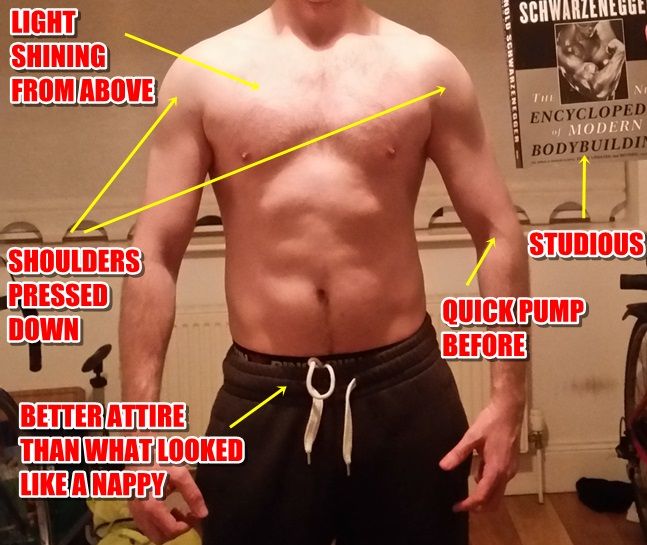
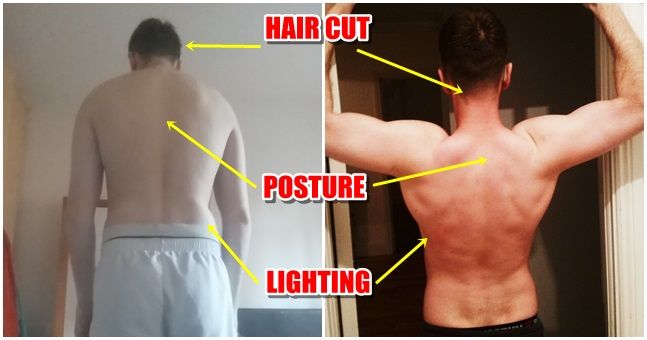 If you have a pull-up bar to use while you're getting the photo taken, even better.
Basically, show off the muscles you weren't showing originally - everyone is too polite to point out otherwise. Stand under a better light and get some definition in them if you're struggling, like me, to actually get some muscles to pop out.
Working out helps. Diet helps. But so do clothes, so do camera angles, so does lighting, so does your head image, so does your demeanour, your stance and how much you can hold your breath to hang onto the tense for a bit longer.
This isn't just a body transformation. It's a life transformation and, as long as you look happier and less helpless in the second photo, your programme will look like it has down the job.
We rarely just get to compare the improvements side by side with an identically-taken shot. Social media isn't a place for our true selves after all. You can be whoever you want to be with the right trick.
It's about your journey from a dark place to a light place - metaphorically and literally.
If you have a pull-up bar to use while you're getting the photo taken, even better.
Basically, show off the muscles you weren't showing originally - everyone is too polite to point out otherwise. Stand under a better light and get some definition in them if you're struggling, like me, to actually get some muscles to pop out.
Working out helps. Diet helps. But so do clothes, so do camera angles, so does lighting, so does your head image, so does your demeanour, your stance and how much you can hold your breath to hang onto the tense for a bit longer.
This isn't just a body transformation. It's a life transformation and, as long as you look happier and less helpless in the second photo, your programme will look like it has down the job.
We rarely just get to compare the improvements side by side with an identically-taken shot. Social media isn't a place for our true selves after all. You can be whoever you want to be with the right trick.
It's about your journey from a dark place to a light place - metaphorically and literally.
Irish Olympian Ciarán Ó Lionáird dies suddenly aged 38
World of Sport

World of Sport

World of Sport

World of Sport

Live sport on TV in Ireland this weekend – Football, GAA, Rugby – June 5th to 7th
One of the year’s biggest games! This weekend’s sport is more about quality over quantity. While there might not be as much footy or GAA as usual, there are some massive clashes, including the hugely anticipated Munster SHC final between Cork and Limerick. On top of that, you can feast your eyes on the Leinster […]
World of Sport
1 week ago
Live sport on TV in Ireland this weekend – Football, GAA, Rugby – May 29th to May 31st
One of the year’s biggest games! The Premier League is over, as is the Champions Cup. But fear not, however, as this weekend serves up one of the biggest games of the year in any sport: the Champions League final. On top of that, we have more All-Ireland SFC to look forward to, and the […]
World of Sport
2 weeks ago
World of Sport

World of Sport
Live sport on TV in Ireland this weekend – Football, GAA, Rugby – April 24th to 26th
World of Sport


